
Wall Tile Replacement Guide: Achieve Flawless Results Easily
Over 60 percent of british homeowners attempt DIY tile replacement at some point, yet many run into trouble right at the start. The first steps, from assessing your wall’s condition to preparing a clean surface, can make or break your entire project. Tackling these early challenges with the right strategy sets the stage for a professional finish and saves time down the line. Discover key tips designed to help you avoid common mistakes and achieve a flawless wall transformation.
Table of Contents
- Step 1: Assess Existing Tiles And Prepare Area
- Step 2: Remove Damaged Tiles And Clean Surface
- Step 3: Apply Adhesive And Position New Tiles
- Step 4: Grout And Seal The Tile Joints
- Step 5: Verify Alignment And Clean Finished Wall
Quick Summary
| Key Point | Explanation |
|---|---|
| 1. Assess surface thoroughly | Inspect for cracks, loose tiles, or mould before beginning tile removal to ensure adhesion and longevity of new tiles. |
| 2. Use protective gear during removal | Wear safety goggles, gloves, and masks to protect yourself while removing tiles and cleaning surfaces. |
| 3. Apply adhesive evenly and accurately | Spread adhesive with a notched trowel to create ridges, ensuring tiles bond securely to the wall without premature drying. |
| 4. Ensure proper grouting technique | Apply grout diagonally and clean excess promptly to prevent haze, maintaining an attractive and professional finish. |
| 5. Final checks for alignment and cleanliness | Use a spirit level to confirm tile alignment and clean surfaces to achieve a polished, professional-looking wall. |
![]()
Step 1: Assess Existing Tiles and Prepare Area
Successful wall tile replacement begins with thorough preparation and careful assessment of your existing surface. According to Skills England, proper background preparation is critical for ensuring tile adhesion and long-lasting results.
Start by conducting a comprehensive inspection of the current wall surface. Look for signs of damage such as cracks, loose tiles, mould growth, or uneven areas. Gently tap each existing tile with a small hammer or rubber mallet to check for hollow sounds that might indicate poor adhesion. Use a spirit level to assess the wall’s flatness and identify any significant variations in the surface plane.
Before removing existing tiles, protect surrounding areas by covering floors, adjacent surfaces, and fixtures with sturdy dustsheets. Wear safety goggles, dust masks, and robust gloves to prevent injury during removal. Use a chisel and hammer to carefully remove damaged or loose tiles, working methodically from the centre of the wall outwards. Remove old grout and adhesive completely, creating a clean, smooth surface ready for new tile installation.
As recommended by Occupational Maps, always plan your order of works and conduct thorough pre installation checks. This systematic approach will help you achieve a professional finish and prevent potential issues during your tiling project.
Pro Tip: Take measurements and photographs of the area before starting. These will help you calculate exact tile quantities and serve as a reference point throughout the renovation process.
Step 2: Remove Damaged Tiles and Clean Surface
Now that you have assessed the wall surface, it is time to systematically remove damaged tiles and prepare a clean foundation for your new installation. According to Skills England, carefully removing individual damaged tiles without compromising adjacent surfaces is crucial for a professional result.
Begin by identifying the tiles that require removal. Use a cold chisel and hammer to gently tap and crack the damaged tiles, working from the centre outwards. Wear safety glasses and sturdy gloves to protect yourself from sharp tile fragments. Remove tile pieces carefully, taking care not to damage the underlying wall surface or surrounding tiles. Once the damaged tiles are removed, use a scraper or chisel to eliminate any remaining adhesive or grout, creating a smooth and clean surface.
As highlighted by Insulation, thorough surface cleaning is essential to prevent potential mould growth and ensure proper tile adhesion. Clean the exposed wall area using a wire brush to remove loose debris, then apply a specialised tile cleaning solution to eliminate any residual adhesive, dirt, or potential mould spores. Allow the surface to dry completely before proceeding with the next stage of your tiling project.
Pro Tip: Work slowly and methodically, keeping the surrounding area protected with dustsheets and maintaining a clean workspace throughout the tile removal process.
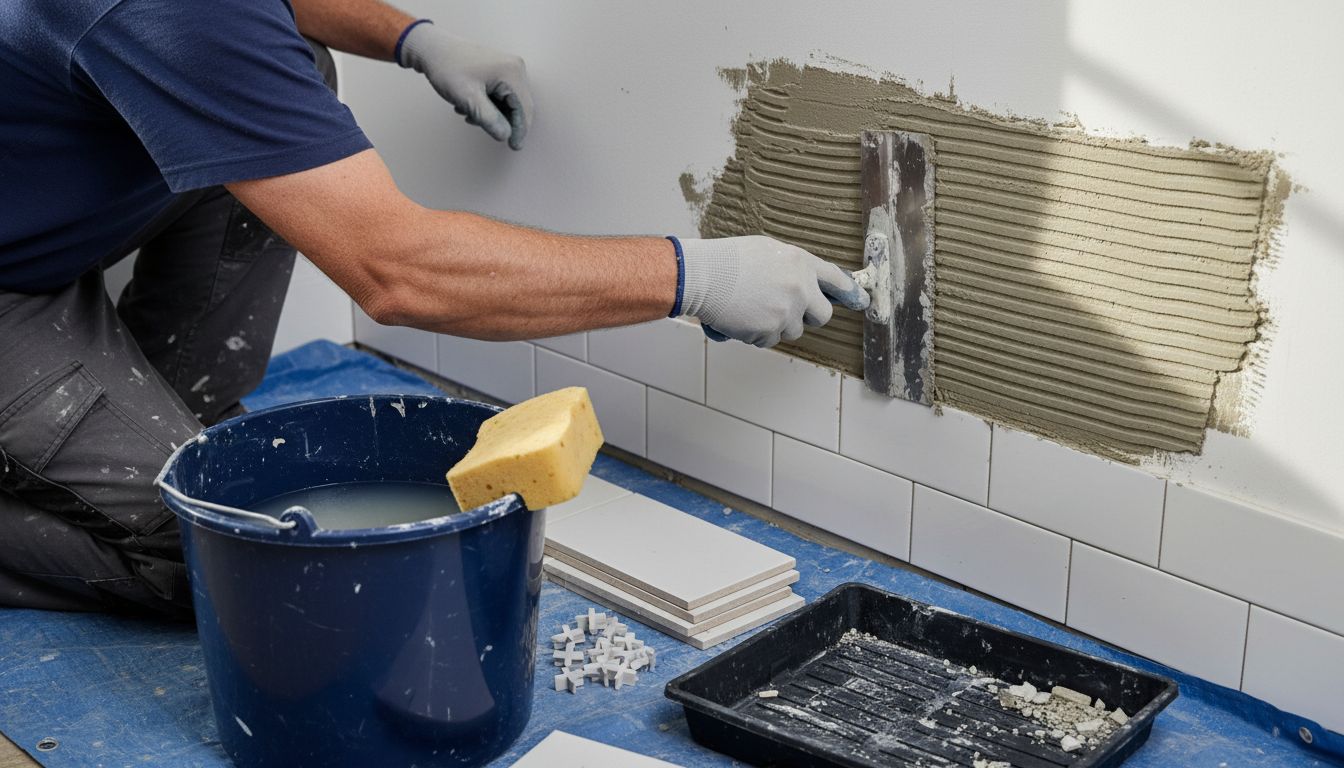
Step 3: Apply Adhesive and Position New Tiles
With the surface prepared, you are now ready to apply adhesive and carefully position your new tiles. According to Skills England, proper adhesive application and tile fixing are critical for achieving a durable and professional finish.
Start by selecting a high-quality tile adhesive appropriate for your specific wall surface and tile type. Using a notched trowel, spread the adhesive evenly across a small section of the wall, holding the trowel at a 45 degree angle to create consistent ridges. Work in small manageable sections to prevent the adhesive from drying before tile placement. Carefully position each tile with gentle pressure, using tile spacers to maintain consistent gaps between tiles. Press each tile firmly to ensure complete adhesion and remove any excess adhesive immediately with a damp sponge.
As outlined by Occupational Maps, achieving a professional tile installation requires precision in positioning and alignment. Use a spirit level frequently to check that tiles remain straight and even throughout the installation process. Take your time and work methodically, checking alignment and spacing as you progress.
Pro Tip: Clean tile spacers and tools immediately after use to prevent dried adhesive from hardening and making cleanup more difficult. Keep a bucket of water and clean cloths nearby to manage any adhesive spillage quickly.
Step 4: Grout and Seal the Tile Joints
With your tiles positioned perfectly, it is time to complete your wall transformation by grouting and sealing the tile joints. According to Skills England, proper grouting is essential for maintaining the integrity of your tile installation and creating a professional finished appearance.
Begin by selecting a grout colour that complements your tiles and room design. Using a rubber grout float, apply the grout diagonally across the tile joints, ensuring complete coverage and pressing firmly to eliminate air pockets. Work in small sections and hold the float at a 45 degree angle to push grout deeply into the joints. After initial application, wait approximately 15 to 20 minutes for the grout to slightly set, then use a damp sponge to carefully wipe away excess grout from tile surfaces, being careful not to remove grout from the joints.
As suggested by Fabritec, managing grout haze is crucial for achieving a flawless finish. After the initial cleaning, allow the grout to cure for 24 hours, then use a clean microfibre cloth to buff away any remaining grout residue. For added protection, consider applying a grout sealer to prevent moisture penetration and maintain the appearance of your newly tiled wall.
Pro Tip: Always test grout colour on a small inconspicuous area first and keep a bucket of clean water and fresh cloths nearby to manage any unexpected grout spillage quickly.
Step 5: Verify Alignment and Clean Finished Wall
With your tiles installed and grouted, the final stage involves meticulously verifying the alignment and achieving a pristine finish. According to Skills England, ensuring consistent joint widths and maintaining parallel lines is crucial for a professional tiling result.
Carefully inspect the entire wall surface using a spirit level and straight edge, checking for any tiles that sit slightly proud or recessed. Gently tap protruding tiles with a rubber mallet to level them, or carefully remove and reposition tiles that are significantly misaligned. Use a measuring tape to verify that joint spacing remains uniform across the entire surface, paying close attention to corners and edges where alignment can become challenging.
As recommended by Fabritec, completing your tiling project requires thorough surface cleaning. Use a specialised tile cleaner or a mixture of warm water and mild detergent to remove any remaining grout residue or installation debris. Work systematically across the wall, using a soft microfibre cloth to polish tiles and eliminate any cloudy grout haze, ensuring a crystal clear and professional looking finish.
Pro Tip: Take a step back and photograph your finished wall from multiple angles. This will help you spot any minor imperfections and provide a satisfying before and after comparison of your hard work.
Transform Your Walls with Confidence and Style
Replacing wall tiles can feel overwhelming when facing challenges like imperfect surface preparation, tricky tile alignment, or grout application concerns. This guide highlights the crucial steps you need to master — from assessing damaged tiles to applying grout and creating that flawless finish. If you want to avoid common pitfalls such as poor tile adhesion or uneven grout joints, choosing the right tiles and materials makes all the difference.

Discover our wide selection of premium, affordable tiles at Vivido Tiles and bring your vision to life. Whether you prefer porcelain, marble effect, or natural stone, we offer products designed for easy installation and lasting beauty. Explore expert advice and make your renovation smoother today by visiting Vivido Tiles showroom in Harrogate to see our collections in person. Take the first step towards a stunning freshly tiled wall now and shop confidently with free UK delivery on many items.
Frequently Asked Questions
How do I assess my existing wall tiles before replacement?
Begin by inspecting the surface for damage like cracks, loose tiles, or mould growth. Tap each tile gently to check for hollow sounds, and use a spirit level to ensure the wall is flat.
What tools do I need to remove damaged tiles safely?
You will need a cold chisel, hammer, safety goggles, sturdy gloves, and a scraper to remove old tiles and adhesive. Work carefully to avoid damaging adjacent tiles while removing the damaged ones.
How can I ensure proper adhesive application when positioning new tiles?
Use a notched trowel to spread adhesive evenly across a small section of the wall, ensuring to hold the trowel at a 45-degree angle for consistent ridges. Position tiles gently, using spacers to maintain gaps, and press firmly for complete adhesion.
What steps should I take to grout and seal the tile joints effectively?
Select a grout colour that complements your tiles and apply it using a rubber grout float, ensuring to fill the joints completely. After initial application, wait about 15 to 20 minutes before wiping away excess grout with a damp sponge and consider applying a sealer for added protection.
How do I check alignment and clean the finished tiled wall?
Inspect the wall using a spirit level and straight edge to confirm that all tiles are aligned and at consistent joint widths. After correcting any misaligned tiles, clean the surface with a mild detergent solution to remove grout residue and achieve a polished finish.
What precautions should I take during the tile replacement process?
Always wear safety goggles, dust masks, and gloves to protect yourself from injury. Additionally, cover surrounding areas with dustsheets and keep a clean workspace to manage any mess during the tile removal and installation process.
Recommended
- Floor Tile Replacement Guide: Achieve Perfect Results Easily - Vivido – Vivido Tiles
- Wall Tiling Steps for a Perfect Finish: Complete Guide - Vivido Tiles
- Floor Tiling Workflow: Achieve Flawless Tile Installation – Vivido Tiles
- Wall Tiling Tutorial: Achieve Flawless Results Step-by-Step - Vivido – Vivido Tiles
- 7 Essential Examples of Home Repairs Every Owner Should Know - Astrotech Construction
- Bathroom Upgrades: Everything You Need to Know - Astrotech Construction