
Landlord Tile Replacement Guide for Cost-Effective Upgrades
Landlord Tile Replacement Guide for Cost-Effective Upgrades
Landlord Tile Replacement Guide: Most British landlords in North Yorkshire know that worn tiles can instantly lower tenant interest and perceived property value. Property surveys reveal that over 60 percent of rental applicants judge homes by kitchen and bathroom finishes. Affordable tile replacement makes a real difference in attracting long-term tenants and staying competitive. This guide breaks down proven steps for assessing old tiles, choosing budget-friendly replacements, and achieving a professional result that appeals to both your bottom line and your tenants.
Table of Contents
- Step 1: Assess Existing Tiles And Identify Replacement Needs
- Step 2: Select Budget-Friendly Tiles For Maximum Impact
- Step 3: Prepare Property And Remove Old Tiles Safely
- Step 4: Install New Tiles Using Tested Methods
- Step 5: Verify Tile Finish And Tidy Workspace
Quick Summary
| Key Insight | Explanation |
|---|---|
| 1. Inspect Existing Tiles | Conduct a thorough visual inspection to identify wear, damage, or deterioration that requires tile replacement. |
| 2. Choose Cost-Effective Tiles | Select durable, budget-friendly tiles like ceramic or quarry to maximise aesthetic appeal without overspending. |
| 3. Prioritise Safety in Removal | Implement safety precautions like asbestos testing and protective gear to ensure a safe tile removal process. |
| 4. Ensure Professional Installation | Follow systematic installation techniques for a high-quality finish, using proper tools and preparation. |
| 5. Verify Finish and Clean Up | Conduct a detailed inspection for imperfections, ensuring all debris is cleaned and the workspace is organised. |
Step 1: Assess Existing Tiles and Identify Replacement Needs
Understanding the current condition of your property’s tiles is the first critical step in planning cost-effective upgrades. As a landlord, you need a systematic approach to evaluating tile quality and determining whether replacement is necessary.
Begin by conducting a thorough visual inspection of your tiles, paying close attention to signs of wear and damage. Historic tile assessment techniques recommend examining surface integrity, checking for structural defects, and noting areas of significant deterioration. Look for common issues like hairline cracks, loose tiles, discolouration, or surface erosion that might compromise the overall appearance and functionality of your space.
Prioritise replacement for tiles with structural damage or those that significantly impact the property’s aesthetic appeal. Focus on high-traffic areas like kitchens, bathrooms, and entryways where tile condition directly influences tenant perception and property value. Photograph each area to document the current state and create a clear reference point for your renovation strategy.
Expert Recommendation: Conduct your tile assessment during daylight hours and use strong, direct lighting to reveal subtle imperfections that might be missed during casual inspection.
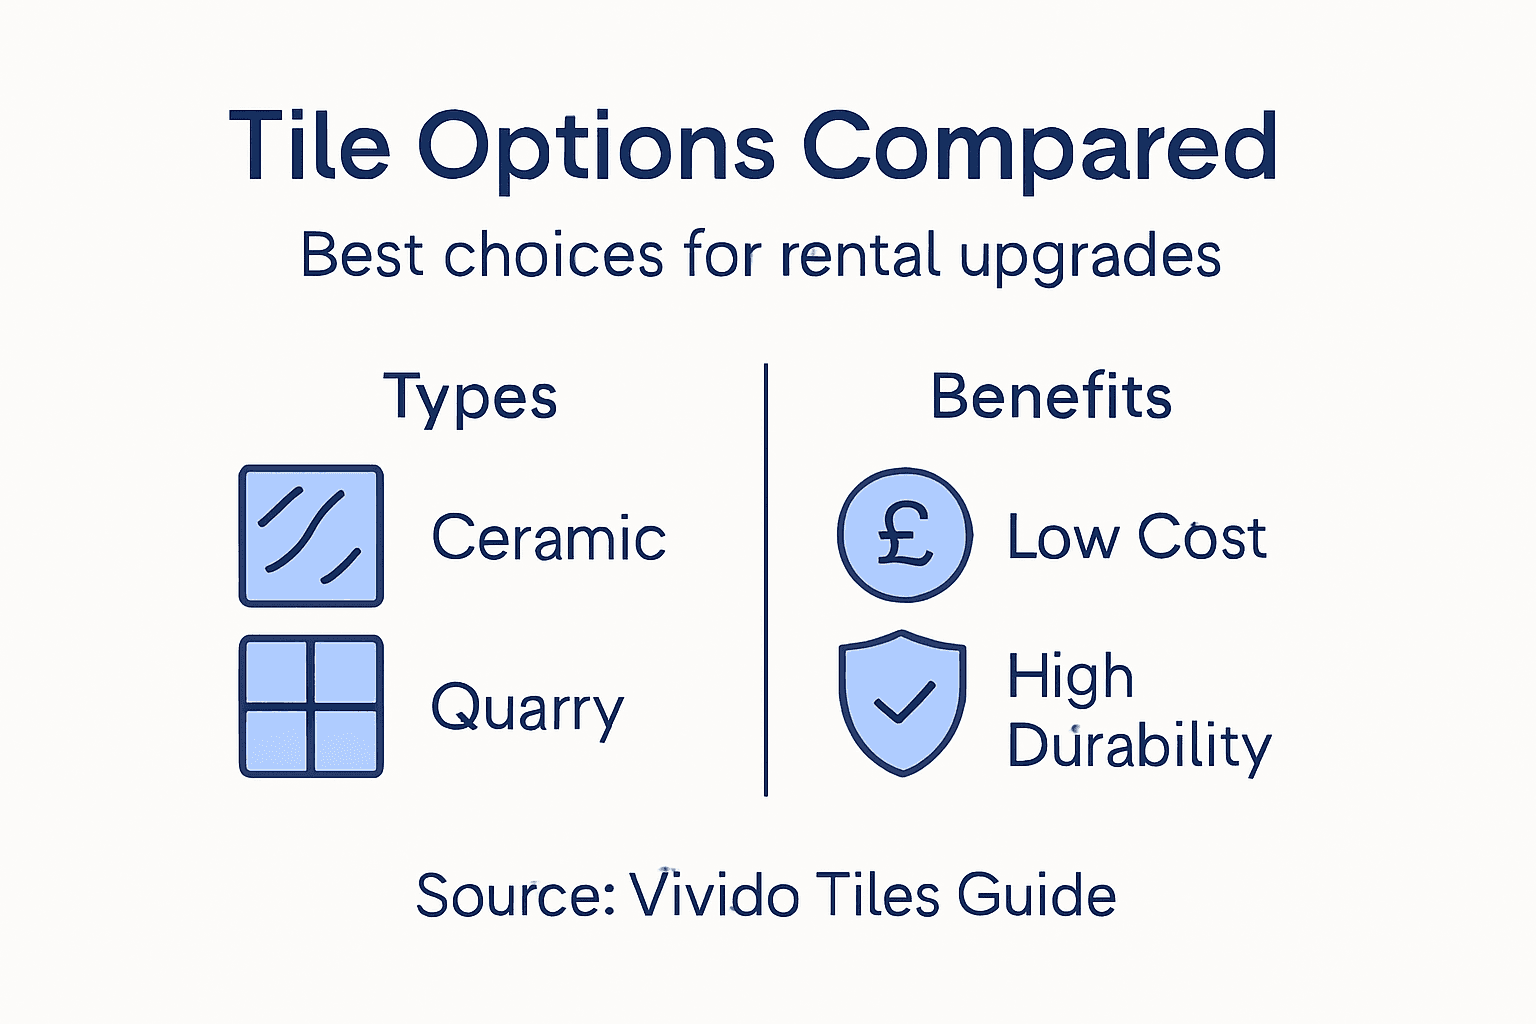
Step 2: Select Budget-Friendly Tiles for Maximum Impact
Selecting the right tiles can transform your rental property while keeping costs manageable. Your goal is to find a balance between affordability and visual appeal that attracts quality tenants and enhances property value.
Consider economical tile options for UK properties that offer durability and style. Ceramic and quarry tiles present excellent budget-friendly solutions for landlords. These materials provide robust performance in high-traffic areas while maintaining an attractive appearance. Drawing inspiration from historic industrial tile designs, look for mass-produced options that deliver aesthetic charm without breaking the bank.
Focus on neutral colour palettes and classic designs that appeal to a broad range of tenants. Prioritise tiles with consistent quality and minimal maintenance requirements. Ceramic tiles in standard sizes typically offer the best value considering installation costs and long-term durability. Choose lighter shades that create a sense of spaciousness and help mask minor wear and tear.
Pro Recommendation: Compare tile prices per square metre and factor in installation costs to determine the most cost-effective long-term solution for your rental property.
Here is a comparison of popular tile types suitable for UK rental properties:
| Tile Type | Cost Effectiveness | Durability | Tenant Appeal |
|---|---|---|---|
| Ceramic | Very affordable | High | Neutral style |
| Quarry | Moderate | Very high | Classic look |
| Porcelain | Higher price | Exceptional | Modern finish |
| Natural Stone | Expensive | Variable | Luxury appeal |
This table provides a quick reference for landlords considering various tile materials based on budget, resilience, and attractiveness.
Step 3: Prepare Property and Remove Old Tiles Safely
Removing existing tiles requires careful planning and safety precautions to protect both your property and your personal wellbeing. Your goal is to create a clean surface ready for new tiling while minimising potential damage and health risks.
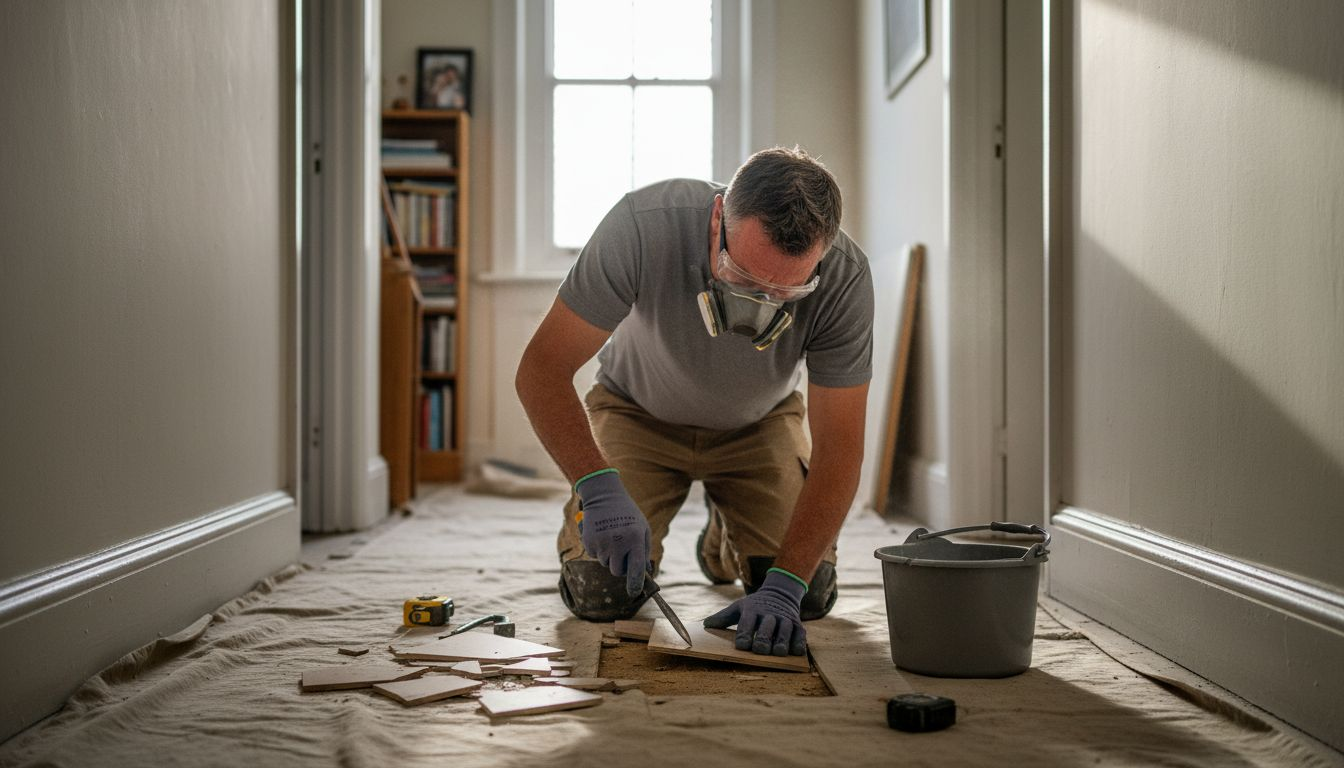
Before beginning demolition, implement critical safety checks for tile removal. Properties constructed before 1992 demand professional asbestos testing to prevent potential health hazards. Wear protective equipment including heavy-duty gloves, safety glasses, and a dust mask. Carefully remove quarry tiles using specialised techniques that minimise surface damage. Start by clearing the workspace completely and protecting surrounding areas with dust sheets. Use specialised scrapers and potentially a heat gun to loosen adhesives without causing unnecessary structural damage.
Prepare for proper disposal by separating tile materials and checking local regulations regarding construction waste removal. Consider hiring a skip or consulting local waste management services to handle the debris responsibly. Work systematically across the space, removing tiles in sections and keeping the area clean as you progress.
Pro Recommendation: Photograph the existing tile installation before removal to document the original condition and help plan your replacement strategy.
Below is a summary of crucial safety measures when removing old tiles:
| Safety Measure | Why It Matters | Benefits |
|---|---|---|
| Asbestos Testing | Checks for hazardous fibres | Prevents health risks |
| Protective Equipment | Shields from sharp edges | Reduces injury possibilities |
| Dust Sheet Use | Limits mess and debris spread | Protects property interiors |
| Section-by-section Work | Controls removal process | Minimises accidental damage |
Landlords should follow these protocols to ensure a safe, efficient tile removal process.
Step 4: Install New Tiles Using Tested Methods
Successfully installing new tiles requires precision, patience, and a systematic approach. Your goal is to create a professional finish that enhances your rental property’s value and aesthetic appeal.
Professional tile installation techniques demand careful surface preparation and strategic application. Begin by ensuring the subfloor is completely clean, dry, and level. Use a spirit level to check the surface and apply a levelling compound if needed to create a smooth base. Follow step by step floor tile installation methods that include precise marking, strategic adhesive application, and careful tile placement. Start from the centre of the room and work outwards, using spacers to maintain consistent gaps and alignment.
Mix tile adhesive according to manufacturer instructions, applying it evenly with a notched trowel. Work in small sections to prevent the adhesive from drying before tile placement. Press each tile firmly, twist slightly to ensure good contact, and remove excess adhesive immediately. Allow sufficient drying time before applying grout, and clean tiles thoroughly to prevent residue buildup.
Pro Recommendation: Invest in quality tiling tools and take your time during installation to avoid costly mistakes that could compromise the entire project.
Step 5: Verify Tile Finish and Tidy Workspace
The final stage of your tile replacement project involves a critical review of your work and ensuring the workspace is returned to its pristine condition. Your meticulous approach here will determine the overall quality and professionalism of your renovation.
Surface finish verification techniques require careful inspection of your newly installed tiles. Check for consistent alignment, even grout lines, and smooth transitions between tiles. Look for any uneven edges, adhesive residue, or slight differences in tile height that might compromise the overall finish. Run your hand gently across the surface to detect any imperfections that might not be immediately visible.
Proceed with a comprehensive clean up following professional workspace organization principles. Remove all tools, collect debris, and wipe down surfaces thoroughly. Vacuum the area meticulously, paying special attention to grout lines and tile edges. Dispose of waste materials responsibly and store any remaining supplies neatly for potential future use.
Pro Recommendation: Allow the newly tiled area to settle for 24 hours before heavy foot traffic, and use this time to take photographs documenting your successful renovation project.
Upgrade Your Rental Property with Affordable Premium Tiles from Vivido Tiles
Replacing worn or damaged tiles can feel overwhelming for landlords aiming to balance cost and quality. The guide highlights key challenges such as choosing budget-friendly yet durable tiles, safe removal of old tiles, and achieving a professional finish that appeals to tenants. At Vivido Tiles, we understand these concerns and offer a vast selection of high-quality porcelain, natural stone, and budget-conscious ceramic tiles designed to enhance any rental property with lasting style and resilience.

Start your tile replacement journey today by browsing our easy-to-navigate website Vivido Tiles where you can find exclusive pricing and fast UK delivery on many items. For those who want to see texture and colours in person, visit our new showroom in Harrogate and get expert advice tailored to your project needs. Don’t wait to transform your rental spaces with premium tiles that save you money over time and impress tenants from the moment they enter. Explore our collections now and take the first step towards a stunning, cost-effective upgrade.
Frequently Asked Questions
How do I assess the condition of existing tiles before replacing them?
Begin by conducting a thorough visual inspection of the tiles, looking for signs of wear such as cracks, loose tiles, or discolouration. Document any areas requiring attention with photographs to create a reference point for your replacement strategy.
What types of tiles should I consider for cost-effective upgrades?
Focus on budget-friendly options like ceramic and quarry tiles, which provide durability and an appealing aesthetic. Select neutral colours and classic designs to attract a wide range of tenants while ensuring ease of maintenance.
What safety precautions should I take when removing old tiles?
Prioritise safety by wearing protective equipment such as heavy-duty gloves and a dust mask. Also, check for asbestos in older properties, as proper testing is essential to prevent health risks during tile removal.
What steps should I follow for properly installing new tiles?
Ensure the subfloor is clean, dry, and level before applying adhesive. Use spacers for consistent gaps, press the tiles firmly into the adhesive, and promptly clean excess adhesive to maintain a professional finish.
How can I verify the quality of my new tile installation?
Inspect the newly laid tiles for consistent alignment and even grout lines. Use your hand to detect any uneven surfaces and conduct a thorough clean-up to ensure the area is pristine before allowing foot traffic.