
Cost-Effective Tile Upgrades: Transform Your Space Affordably
Cost-Effective Tile Upgrades: Transform Your Space Affordably
Tile Upgrades: Over half of British homeowners say renovating with new tiles is their top choice to update living spaces. Choosing the right approach starts with a clear look at your existing tiles and a realistic budget. Whether your project is big or small, smart decisions at every stage can save you money, reduce stress, and ensure long-lasting style. This guide shows practical ways to get quality results, with tips designed for British homes and budgets.
Table of Contents
- Stage 1: Assess Your Existing Tiling and Set Your Budget
- Stage 2: Select the Right Cost-Effective Tile Styles
- Stage 3: Plan and Prepare Your Tiling Surface
- Stage 4: Install Tiles Using Budget-Friendly Techniques
- Stage 5: Inspect and Finish for Long-Lasting Results
Quick Summary
| Main Insight | Description |
|---|---|
| 1. Evaluate Current Tiling and Budget | Conduct a detailed assessment of your existing tiles and establish a realistic budget to avoid unexpected costs. |
| 2. Choose Stylish, Cost-Effective Tiles | Opt for affordable tile styles like ceramic or porcelain, focusing on neutral colours and classic designs for broader appeal. |
| 3. Ensure Proper Surface Preparation | Thoroughly prepare the surface by cleaning the tile, levelling, and repairing to prevent installation failures and extend tile lifespan. |
| 4. Follow Smart Installation Techniques | Use cost-saving methods such as DIY techniques and careful layout planning to minimise waste and maintain quality. |
| 5. Inspect and Finish Carefully | Complete a thorough final inspection and apply a tile sealer to enhance durability and ensure a professional finish. |
Stage 1: Assess Your Existing Tiling and Set Your Budget
Transforming your space with new tiles requires a strategic approach that starts with careful assessment and smart budgeting. Understanding your current tiling condition will help you make informed decisions about potential upgrades and prevent unexpected expenses.
Begin by conducting a thorough visual inspection of your existing tiles. Look for signs of wear such as cracks, chips, loose tiles, or grout deterioration. Trusted home renovation surveys suggest professional assessments can reveal hidden issues that might impact your renovation budget. Measure the total area requiring tile work to calculate precise material costs. Remember that different rooms have varying requirements ceramic tiles might work perfectly in a kitchen, while porcelain could be ideal for bathroom tiles.
Calculate your budget by considering multiple factors including tile material, labour costs, and potential preparatory work. Comprehensive bathroom renovation guides indicate UK homeowners typically spend between £500 to £5000 on tiling projects, depending on space size and tile quality. Factor in an additional 10 15 percent contingency for unexpected repairs or design modifications.
Professional advice: When budgeting for tile upgrades, always prioritise quality over quantity. Investing in durable, well fitted tiles will save you money on future repairs and maintenance.
Stage 2: Select the Right Cost-Effective Tile Styles
Selecting affordable yet stylish tiles requires a strategic approach that balances your aesthetic preferences with practical budget considerations. This stage involves exploring diverse tile options that deliver maximum visual impact without breaking the bank.
Modern bathroom tile designs offer innovative solutions for budget conscious homeowners ranging from porcelain and ceramic to recycled composite materials. Ceramic tiles remain an excellent cost effective choice for most areas, providing durability and versatility at a reasonable price point. Consider large format tiles which can reduce installation costs by minimising grout lines and creating a seamless appearance. Porcelain tiles offer slightly higher durability and water resistance compared to standard ceramics, making them ideal for high moisture areas like bathrooms and kitchens.
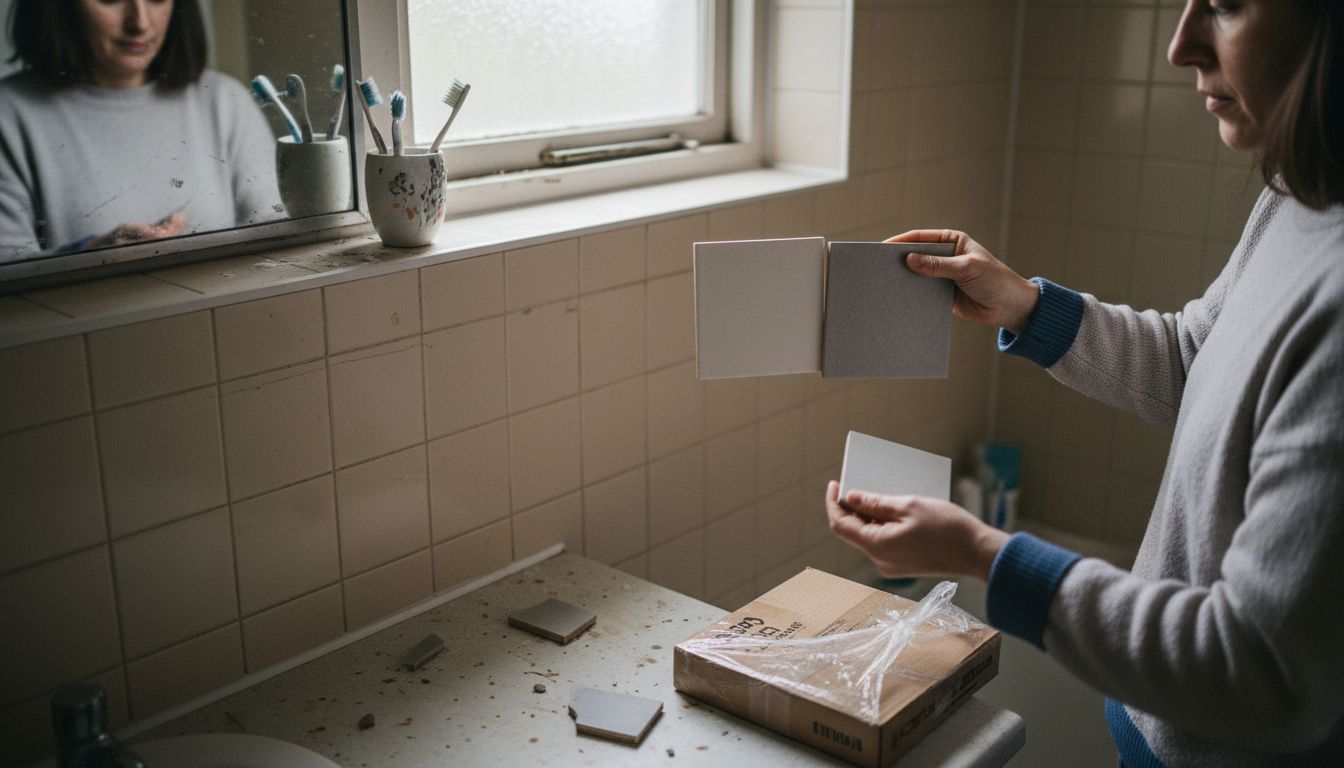
When exploring budget friendly tile styles, focus on neutral colour palettes and classic designs that provide timeless appeal. Clay plain tiles present an attractive option with varying aesthetic characteristics, including handmade and machine produced varieties that suit different architectural styles. Look for tiles with standardised sizes to reduce cutting waste and minimise additional labour expenses. Opt for lighter coloured tiles which can make spaces appear larger and brighter without additional investment.
Professional advice: Always purchase approximately 10 percent extra tiles to account for potential breakages and future repairs, ensuring you have matching replacements if needed.
Here is a concise comparison of popular tile types for different rooms:
| Tile Type | Typical Rooms | Key Advantages | Estimated Cost (per m²) |
|---|---|---|---|
| Ceramic | Kitchen, hallway | Affordable, easy maintenance | £10–£30 |
| Porcelain | Bathroom, kitchen | High durability, water resistant | £20–£50 |
| Recycled Composite | Utility, eco-spaces | Sustainable, unique texture | £25–£45 |
| Clay Plain Tiles | Living room, feature walls | Handcrafted options, traditional look | £30–£60 |
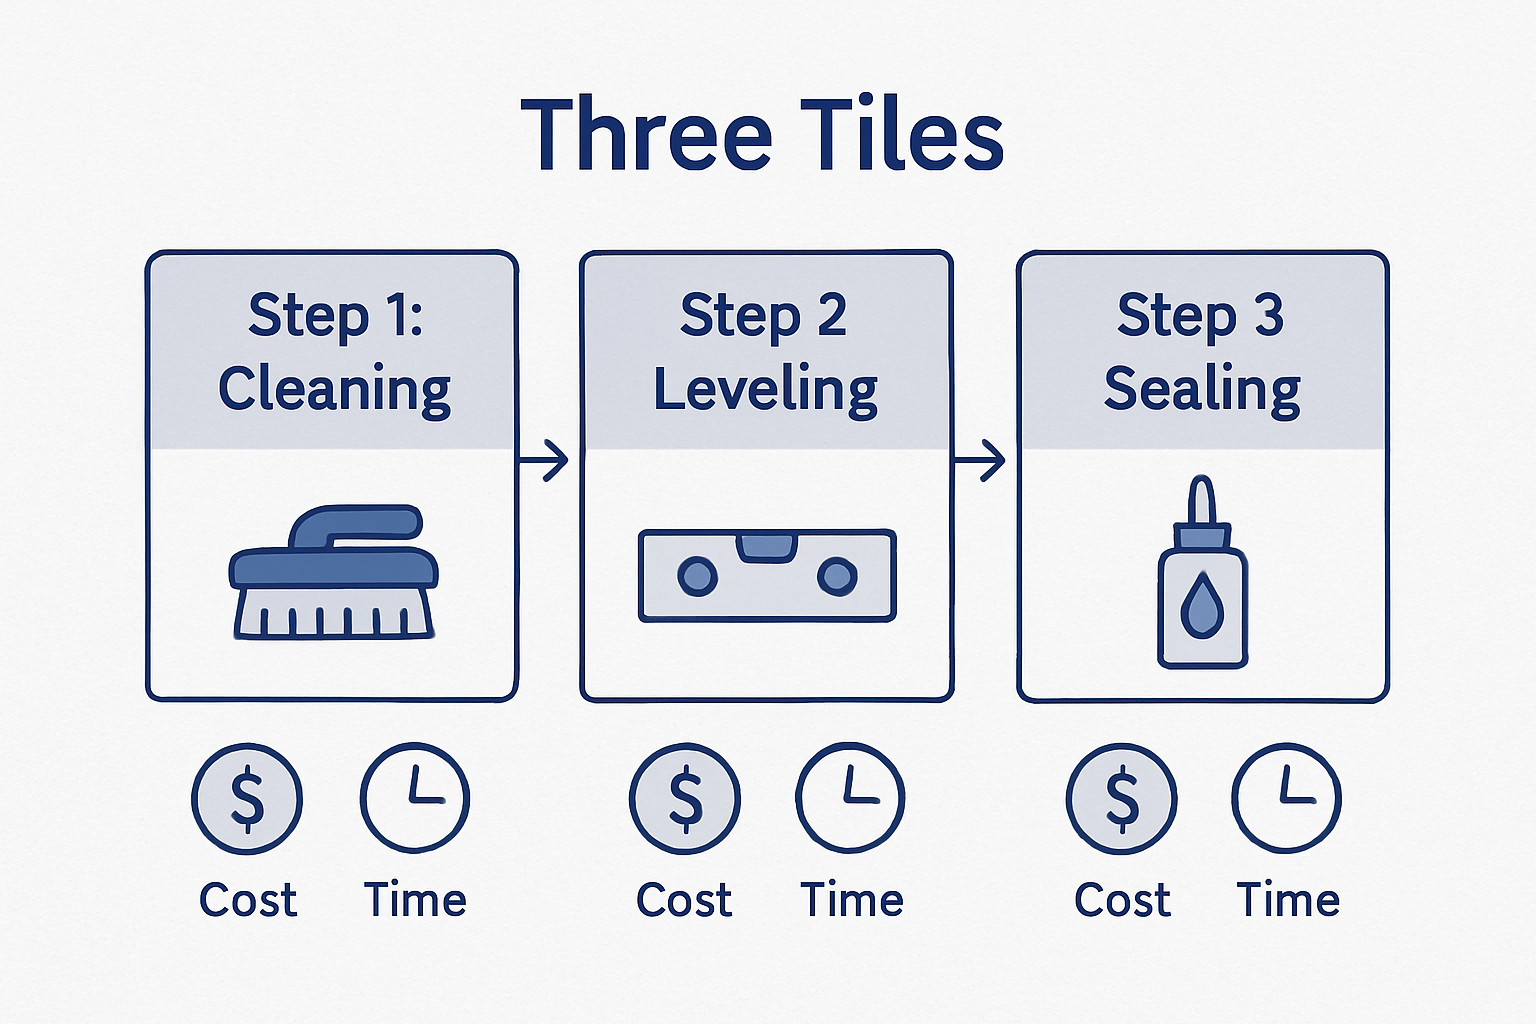
Stage 3: Plan and Prepare Your Tiling Surface
Prepping your surface correctly is the foundation of a successful tile installation. This crucial stage determines the longevity and appearance of your new tiling project, requiring careful assessment and meticulous preparation.
Renovation feasibility studies highlight the critical importance of thorough surface preparation before any tiling work begins. Start by completely clearing the area and removing any existing flooring or wall coverings. Inspect the underlying surface carefully for signs of damage such as cracks, uneven areas, or moisture problems. For floors, ensure the subfloor is structurally sound and level using a spirit level or laser levelling tool. In bathrooms and kitchens, pay extra attention to potential water damage or structural weaknesses that might compromise your tile installation.
Technical guidance for surface preparation emphasises the need for a clean stable base before laying new tiles. Clean the tile surface thoroughly using appropriate cleaning agents to remove dust, grease, and debris. If you have an uneven surface, consider using a latex screed to create a smooth level base. For concrete floors, check for moisture by conducting a simple calcium chloride test or using a moisture metre. When working with plasterboard or wooden surfaces, ensure they are rigid and capable of supporting tile weight without flexing.
Professional advice: Always invest time in proper surface preparation as it represents less than 20 percent of your project time but can prevent 80 percent of potential tiling failures.
The table below summarises essential steps for effective surface preparation:
| Preparation Step | Purpose | Key Tools/Materials |
|---|---|---|
| Clear area | Remove obstructions and debris | Broom, scraper |
| Assess and repair | Identify and fix unevenness | Spirit level, filler |
| Clean thoroughly | Ensure adhesion and longevity | Cleaning agent, sponge |
| Level surface | Create flat base for tiles | Latex screed, leveller |
| Test for moisture | Check for underlying damp issues | Moisture meter, test kit |
Stage 4: Install Tiles Using Budget-Friendly Techniques
Successful tile installation requires strategic planning and smart techniques that minimise expenses without compromising quality. By understanding cost-effective approaches, you can transform your space while keeping your budget intact.
Cost-effective bathroom renovation guides highlight several DIY installation methods that can significantly reduce labour expenses. Begin by gathering essential tools such as a notched trowel, tile spacers, tile cutter, and rubber mallet. Minimise waste by carefully planning your tile layout to reduce cutting and reduce material expenses. Start from the centre of the room and work outwards, using tile spacers to maintain consistent grout lines. This approach helps you achieve a professional finish while maximising your existing tiles and materials.
Innovative tile installation techniques can simplify the process and reduce overall project costs. Consider purchasing premixed adhesive to save time and reduce mixing errors. Use a laser level to ensure straight lines and prevent costly mistakes. When applying adhesive, work in small sections to prevent it from drying before tile placement. For larger areas, rent professional tools instead of purchasing them outright. This strategy can help you access high quality equipment without the full purchase price.
Professional advice: Always purchase 10 percent extra tiles to account for potential breakages and future repairs, ensuring a seamless look without unexpected additional expenses.
Stage 5: Inspect and Finish for Long-Lasting Results
The final stage of your tiling project is critical for ensuring durability, aesthetic appeal, and long-term performance. A thorough inspection and careful finishing will protect your investment and create a professional-looking result.
Professional renovation assessments highlight the importance of meticulous final inspections to identify potential issues before they become costly problems. Start by carefully examining each tile for alignment, checking that grout lines are consistent and tiles are level. Use a spirit level and straight edge to verify the surface is even. Remove any excess adhesive or grout from tile surfaces using a clean damp cloth, ensuring a pristine finish. Pay special attention to corners and edges where precision matters most.
Comprehensive renovation guides recommend systematic finishing techniques to enhance project durability. Apply a high-quality tile sealer to protect grout lines from moisture and staining. Allow sufficient drying time between grouting and sealing to prevent trapping moisture. Clean your newly tiled surface with appropriate cleaning products designed for your specific tile type. Take time to buff and polish tiles, removing any remaining residue and bringing out their natural shine.
Professional advice: Wait at least 48 hours after installation before walking on your new tiles and avoid heavy cleaning for one week to allow adhesives and grout to set completely.
Affordable Tile Solutions to Upgrade Your Space with Confidence
Transforming your home with cost-effective tiling requires balancing quality and budget while addressing common challenges like surface preparation and tile selection. You want tiles that last, provide style, and fit within your renovation budget without compromising durability or appearance. With Vivido Tiles, you gain access to a carefully curated range of premium porcelain, ceramic, and natural stone tiles at budget prices designed to meet your unique needs. Our tiles come with clear details and images allowing confident choices that match your project’s goals.

Explore our collection online or visit our new Tile showroom in Harrogate to see and feel the quality firsthand. Benefit from free UK delivery on many items and expert customer service ready to guide you through selecting the perfect tiles for kitchens, bathrooms, or living spaces. Take the first step towards a stunning transformation by browsing our full range at Vivido Tiles. Discover how affordable premium tiles can be and ensure your next project combines beauty, durability, and value.
Frequently Asked Questions
How do I assess my existing tiles for upgrades?
Begin by visually inspecting your current tiles for cracks, chips, or loose tiles. Measure the area to determine how much new tile you’ll need and consider hiring a professional for a detailed evaluation.
What budget should I set for a tile upgrade?
Consider factors like tile material, labour costs, and potential repairs when calculating your budget. Aim for a budget between £500 to £5000, depending on the space size and quality of tiles you desire.
What are the most cost-effective tile options for my project?
Look into ceramic tiles for affordable durability, porcelain for moisture resistance, and recycled composite materials for eco-friendly options. Plan to use large format tiles, which can help reduce installation costs by minimising grout lines.
What preparation steps should I take before tiling?
Clear the area of any obstructions, inspect the underlying surface for damage, and ensure it’s clean and level. Taking these steps now can help prevent 80% of potential tiling failures later on.
How can I ensure a successful DIY tile installation?
Carefully plan your tile layout, start from the centre of the room, and ensure you have the right tools. Consider renting high-quality tools to maximise efficiency and reduce costs during installation.
What finishing touches do I need for my new tiles?
Inspect each tile for alignment and apply a high-quality tile sealer to protect grout lines. Clean and buff your tiles for a polished look, and wait at least 48 hours before using the area to allow adhesives and grout to set completely.